When lighting an interview, there are several rules to follow that will help make your interview look the best possible. Over the course of this article, I will go over how to light an interview to get a consistently good result. Keep in mind that this should just be a starting point and that experimentation and creativity should always be encouraged when appropriate.
Setting the Shot
Before you start to light an interview, there are a number of things that need to be addressed. The first thing that you need to look at is location. Are you indoors or outdoors? If you are outdoors, is it sunny or overcast? Is it evening or early morning? What do you want your background to look like? How much time do you have to set up?
Some of these factors will likely be out of your control, but the key to success is to control as much as you can. If you are outside during daylight hours, you can not control the sunlight. The best you can hope to do would be to work with the sun as opposed to trying to fight it with other lights.
Sometimes you have a fantastic background to work in front of, and others it is literally just a blank wall. Step 1 should be to set up the best looking shot possible. Try to find the most interesting background that you can. Think about placing props to make the background more interesting. Consider using a light with a colored gel to add a splash of color, either as a wash over everything or as a spotlight to highlight an object in the background. Just as importantly, make sure you have enough distance between the subject and the background to get the shallow depth of field look, if that is appropriate. Remember, to achieve a shallower depth of field, keep the room and subject lit dimly and open the camera aperture as wide as possible. Also keep in mind that time will likely be a factor. It is important to make your plan and execute it as quickly as possible.
When possible use a stand-in to make sure your lights are set before your actual talent arrives. While there may be some minor adjustments made once the talent is on set, everything will run much smoother if you are close to set before everyone is standing around waiting on you.
Lighting an Indoor Interview
Let’s start out by talking about setting up an indoor interview. The biggest benefit is that you have complete control of the light. Ideally, one of the key things would be to have a dark room with either no windows, or heavy curtains that can be closed. Once you have your appropriately prepared room, we are ready to start setting lights. The first thing you need to do is position the “Key Light”.
A Key Light is the light source that provides the majority of the light on a subject. It is typically the most intense light, and illuminates the subject on the side the camera is facing.
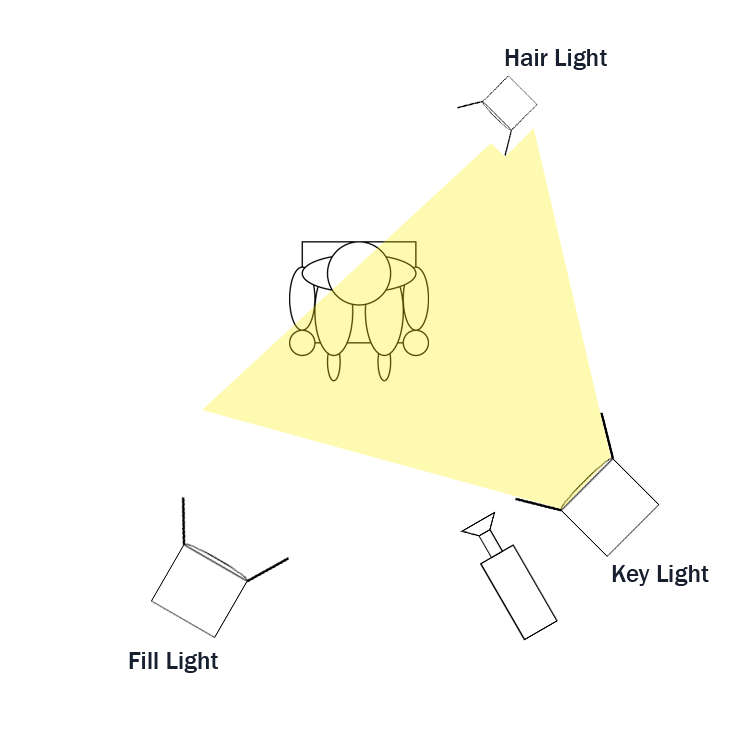
Next, set up your “Fill Light”. A Fill Light is the light source that is used to reduce shadows. A Fill Light often is much less intense than the Key Light and is typically a much “softer” or more “diffused” light. This is accomplished through the use of either a soft box, a reflector, or a diffusion gel.

Next set up your “Hair Light”. A Hair Light is a small fixture, typically a spot light, which is placed high and behind your subject. It is used to give a glow to the edge of your subject and provides separation from the background. Make sure that it’s not in your camera shot.
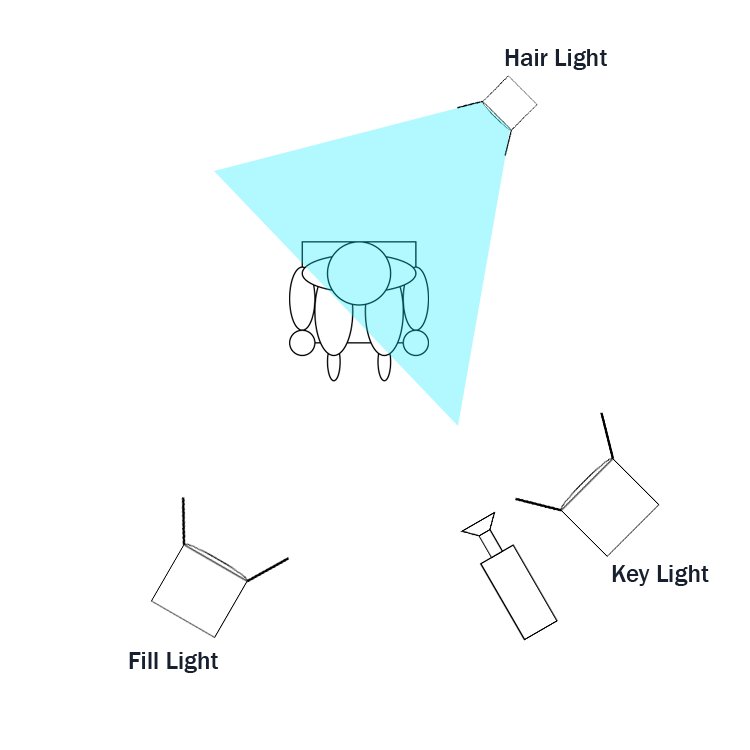
After your subject is lit, place any additional accent lights. Once everything is set up, it’s time to make sure all the lights are aimed exactly where they need to be. Turn off every light fixture, then turn each one on individually. Make sure the light is hitting your stand in where you expect it to. Always try to control the amount of light spill using either barn doors or french flags.
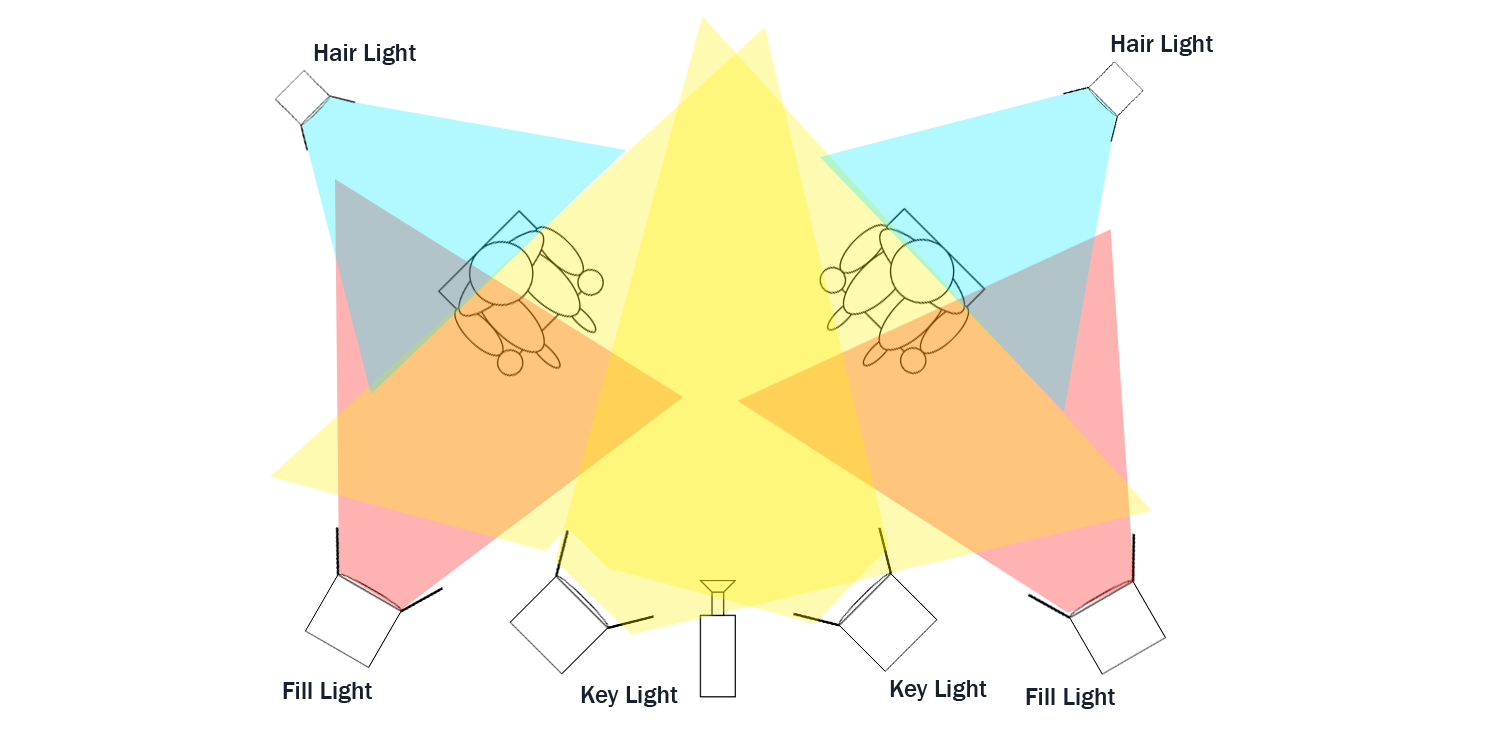
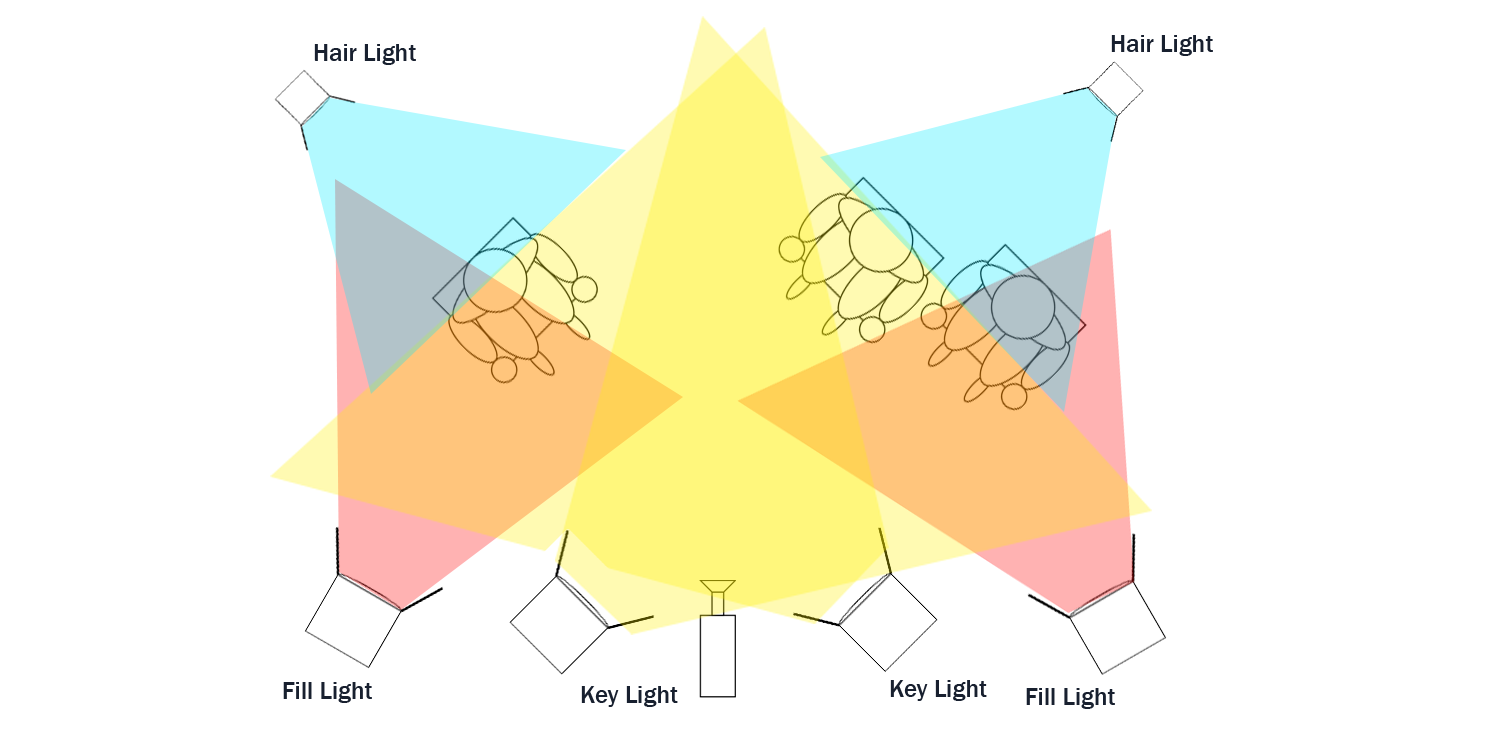
Regardless of the number of subjects you are lighting, using a basic lighting setup along these lines will produce a consistent result that will have the desired appearance of a professional, well lit interview. Also bear in mind, if you position multiple subjects close together side by side, you may not have to add additional fixtures.
Outdoor Interview Lighting
When lighting an outdoor interview during daylight hours there are a few additional things to consider. The sun is a gigantic light, and is doubtlessly much more powerful than any light you have access to. As such, it is typically more beneficial to work with the sun than against it. There are also concerns if you are under a tent or other covered area. The sun can very easily cause a background to be overexposed while your subject is dark under a tent.
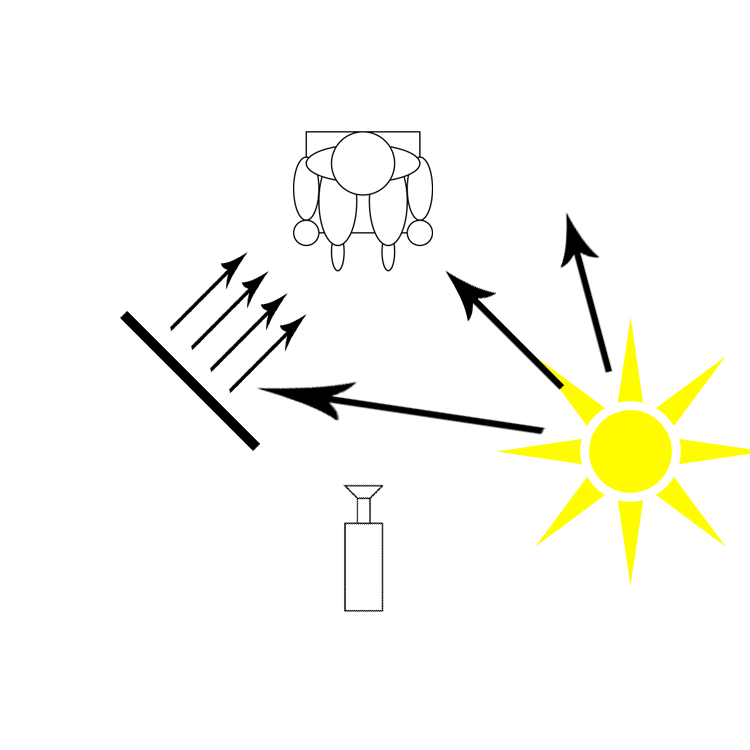
To begin, let’s talk about lighting a subject in an uncovered location. If the sky is clear and the sun is shining brightly, it is usually a good idea to use it as your Key light. It will light your subject fully from one side. Be mindful of both any shadows that may fall across your subject and where their shadow points. It is typically very difficult for your subject to stare into the sun, so make sure you position them at a bit of an angle to it. For your fill light, you have a few different options available. As always, you can set up a light fixture as your Fill light. The other option would be to use a reflector or a bounce card. A reflector is a reflective surface, usually a few square feet in size. It is used to reflect sunlight much like a mirror. A bounce card is a white surface, similar in size to the bounce card, usually made from a piece of foamcore. Similar to a reflector, it will reflect light at the subject, but it is typically more diffused than the light from a reflector. When doing an interview outside, a hair light is rarely useful. Mainly because it will seem to do almost nothing with the sun lighting the subject. These rules apply equally on overcast days, with the key difference being that bounce cards and reflectors become less useful. Overcast days often provide the best look, since it is like a huge softbox type of lighting.
If you are lighting a dim subject with a very bright background, for example an interview under a tent with a full sunny background, there are a few things you can do to make the final product look the best possible. Place a scrim between your subject and the background. Scrim is a fine black mesh screen that will allow the camera to see through it, but everything behind will appear dimmer. At the same time, use as much light as possible to light your subject. The more light you use, the closer it will look to the background in terms of brightness. Remember, you may not be able to beat the sun, but you may be able to come close enough to still have an adequate exposed shot.
Final Thoughts
The lighting information above is a good baseline of knowledge to be able to light an interview well. However, nothing beats actual experience. The scenarios and diagrams above should be thought of as a starting point that you can build from to get the perfect look for your shot. Experiment, try different things, and you might find something really cool. At the same time, have a good foundation to fall back on and you will be prepared for nearly any situation that comes your way.
Written by: Victor Presley
Victor has been working in the broadcast industry since 2005. He has been in the engineering department since 2010, and has been Classic Teleproductions’ Chief Engineer since 2013.
